Completion date: May 3, 2019


I survived last 2 weeks with the new business card holder. It's quite nice-looking, however, it is indeed too small. I could only fit few business cards on each side...I literally threw my cellphone to the floor when I was trying to get a business card out of it (haha~)
I thought hard. Finally I changed from 3 closed sides to 2 closed sides. Like a folder-type sleeve for easy access.
1. First I took out the stitches.
2. Used a curvy ruler to get a perfect curve. It was so convenient I didn't even need to mark with silver pen, I just cut with a cutter.


3. Cut a 3 x 1cm strip for the D-hook. Note I made it longer so that the left flap actually hid the end of the strip.
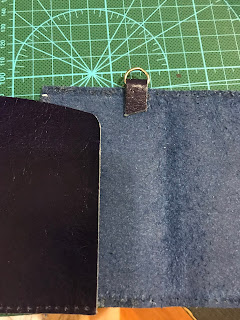

4. Stuck all parts together and sew them together.
Completion date: April 18, 2019


As mentioned previously, I sometimes have to carry 4 things (phone, iPad, Apple Pencil, business cards) together to a meeting. After making my Apple Pencil holder, I have planned to attach a business card holder to the iPad. Finally I thought the best way was for the business card holder to attach to the Apple Pencil holder. All I have to make is a normal business card holder, with a hole (D-shape ring).
Material
Blue leather: HK$139 (from Sham Shui Po) for 40x40cm
Pink leather: RMB$336 (from Taobao, 2016 December) for 11 sq. ft.
D-ring: Taken from scrap material
Spring Clip: RMB$0.7 (from Taobao, 2016 April)
The steps
1. My measurement was based on my business card size. The leather: 10x13cm (blue), 10x5.5cm (blue), 10x5cm (pink). (Important to note: I should have done bigger: 10.5x14cm (blue), 10.5x5.5 (blue), 10.5x5 (pink). )
2. Cut leather size 2x1cm of blue leather. It for creating a loop for the D-ring.
3. Put the small and big blue leather together, with the D-ring looped in the 2x1cm (created in step 2).

4. Put glue on pink leather and stick to the big blue leather.

5. Turn over the whole thing so that front side (big blue leather) is facing up. Use a divider to outline a line 2.5mm from the edge.

6. Punch holes (on front side).

7. Make sure the holes go through the other end.

8. Sew them together.

9. Bind off.

10. Pry open one loop from the spring clip with pliers, to install the loop on the elastic band. Close the loop with pliers again and it's done.

11. Attach the business card holder to the spring clip, and fast-detach at any time.

More product photos:


Comments
Post a Comment