Completion date: April 23, 2020
What is the problem with Sweatpad I? It’s taking too long to install the tissue and from the pad.
I took
- 1 minute 1 second to free the tabs of sweatpads.
- 2 minutes 30 seconds to install tissue paper
- 59 seconds to put sweatpads onto the fabric backing
Materials
- plastic (HK$15/ft, Family House)
- 0.2mm double-sided tape (RMB$12.5 for 1cm x 50m, Taobao). From taobao it says this is imported from Germany, features: durable in high heat, strong, leaves no marks, transparent and water-resistant)
- tissue paper (Tempo or Vinda)
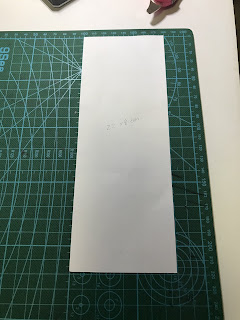
Redesigning the Sweatpad. Set up a template first.
1. Cut a 22x8cm rectangle
2. Fold 4cm deep pockets from both ends.
3. Draw a 1cm margin from the sides.
4. Draw a semi-circle, where the top of the circle is 2cm away from the top pocket crease.
5. Mark a line 5mm away from the edge. Make sure you leave enough room for the Velcro. Cut that line.
6. Cut the line. And then through this line opening, transfer the line to below.
7. Draw a “U”. Length 3.5cm. Erased the line from step 6. Erase the margin lines.
8. Cut the lines.
The Sweatpad II
1. Cut 22x8cm plastic.
2. Clip the paper template with the plastic together.
3. With the paper template on top, flip open the big U opening. Trace the shape to plastic with a marker.
4. Flip open the small “U” and trace onto the plastic.
5. Cut along the marked lines. When done, insert the small “U” into the top flap’s hole.
6. Apply the 3M Velcro on both ends.
7. Fold tissue paper like so.
7. With the Velcro facing down, lay the Sweatpad on top of tissue paper.
8. Fold the Tissue paper’s sides in, draw out the big “U” and put at the top. Put the small “u” through the slit.
9. Put the fabric backing and the sweatpad together by pushing the Velcro’s together. (Making of the fabric backing is in the original sweatpad blog, http://bonniecreations.blogspot.com/2020/02/sweat-pad.html)


Comments
Post a Comment